Over the past thirty years of my artwork career I have created numerous vessels, but few ever were intended to hold liquids. At this point I am planning a series of vessels that will meet the criteria of holding liquids. But what is this c/P business? In a way it notes my wish to join in the movement to clean up our environment; to join in the green movement; to save the planet. Whee! I got a little carried away there, but seriously, think of the tons of glass and plastic containers that go in the dump every day. Yes, I know there has been some progress made with recycling these items, but there is plenty of room for others to join in and that is what I intend to do with my new series of vessels.
By now you may have figured it out. The "e" in the description of my new series stands for all those empty containers on their way to the dump. It is a huge amount of refuse. I have chosen a small e because of the small impact my plan will have on the overall situation. Not to diminish any effort, remember "a long journey starts with the first step".
Now for the "P". That may be somewhat harder to decode, so let me lay it out for you. My vessels will include an "empty" container as the core element and with creative treatment around it, will evolve into a "Precious" container that holds liquid. I want to emphasise the creative treatment around the core so all e/P vessels don't resemble a wine bottle shape with a few frills. Let me illustrate what I envision as a creative treatment with the following evolutionary steps of my first e/P vessel.
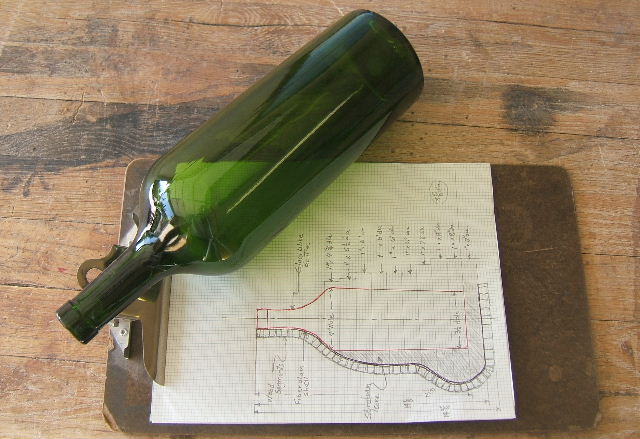
1. Plan your work and work your plan.

2. Styrofoam fit around bottle.

3.After shaping Styrofoam and applying
a protective coating, cover entire surface
with fiberglass cloth.

4. Attach wood segments and
grout spaces between.

5. After final sanding apply two
coats of oil finish. When completely
dry apply two wax coats buffing each.
6. Fashion a top stopper with cork attached.
Sign the bottom and e/P I is finished.
This description does not cover all steps in
detail, but should give an idea what a creative
finish around the container could entail. For a
more complete treatment of this process refer to
my book:
"Unique Vessels: How Do You Make These Things?"
It is featured in my blog,
www.apatchablue.com
No comments:
Post a Comment