Thursday, November 7, 2013

Finished At Last

Have you heard  the old tale about a race between a rabbit and turtle?  Of course the rabbit (or hare) was much faster and left the turtle (or tortoise) in the dust.  The hare was careless and with his big lead took side trips and got involved with other amusements.  On the other hand the tortoise kept plugging along and eventually crossed the finish line with the hare nowhere to be seen.  When the hare remembered the contest he sped to the end of the race to finish second.  The moral of the story is to be a winner, keep your eye on the end goal and don't become distracted by other factors.


I just finished this art piece which I call "Butcher Block Tortoise".  The shell is made of 3/4 inch Oak pieces, glued together with the grain running vertically.  This is the way butcher blocks for kitchens or meat markets are made, hence the name for my tortoise.  I started this piece while living in Wenatchee, Washington and it has moved with us many times over the last thirty plus years.  I have decided to finish up several projects of this nature.  The under-frame for this piece was arc welded and built up when I could use this form of welding.  My pace maker now limits me being around such activity.

Several conclusions could be associated with the Hare/Tortoise story in the first paragraph.  This tortoise took a long time getting to the finish line, and typical of the hare, I got distracted by the many things that came along in my life until I realized the need to race to the goal line with this project.  It feels good to have it finished.  Have a good day and check for tortoise among your accomplishments.


Wednesday, August 28, 2013

Our Apatchablue Home


The first home my wife, JoAnn and I designed together and had built was in Wenatchee, Washington, high in the foothills overlooking the Columbia River as it made it's way past town.  A prominent rock formation called Saddle Rock, located immediately behind us, was a landmark seen from all over the valley.

We had just been married and it was an exciting time for us as we became thoroughly involved in the home building process, collecting materials and making decisions.  Much of our shopping was done in the Seattle area,Spokane and Portland, Oregon.  As the basic construction was progressing, we were locating unique item in these shopping markets and hauling our finds home to store in our little rented house until needed on the construction site.

We found a beautiful irregular cut floor tile in Seattle that had blues and greens in various hues,  mixed in a high glazed surface.  This is how it looked on our bathroom floor.

We found and ordered a truck load of flat blue cement tile for our roof.  When the builder was ready the tile arrived and was unloaded on to the roof.  It gave a finished look and provided a lasting surface.

A substantial change in elevation occurred at the back of the pad which required an eight foot high retaining  wall.  The builder cast a cement wall in place, giving it a pleated pattern to provide strength.  He exposed the aggregate on one surface and left the apposing surface smooth with several recessed
grooves.  The notches this wall design created were ideal spots for planting dwarf fruit trees.


In this scene several features can be seen in addition to the fact that it snows a lot in Wenatchee.  The exterior of the home was covered with vertical fir siding as were many of the interior walls.  Secondly, a cupola had been designed to snuggle into the roof over the second story bunk house, so named because it had extra beds for visitors.  The cupola had padded seats all around for comfortable viewing from this highest vantage point.  Several large pillows were available if one wished to stretch out and relax.


This house wasn't designed for the mobility challenged individual because of its many floor levels.

 Starting in the sunken living room ...

it is several step up into the music area.

Two more steps up reaches the ground floor.  From there a curved staircase leads to a balcony and entrance to the bunk house.              


To enter the cupola it is necessary to scamper up a padded ladder and you are at the top of the house.


Did you notice that deep blue rug in the living room and music area?  On the way up the curved             staircase, a close look is provided of our art collection, hung on the tall sloping wall.


There were many special features in our home such as this carved door at our front entry.  A local artist had a business established in town, producing a variety of patterns that were mechanically carved in the door. The leaded glass window on the far right of the door is shown in detail below.  It is a wisteria pattern and is located in the corner of the master bath.


The bank of clear story windows across the front of the living room and music area gives a tremendous view of the Columbia River.  The fog along the river as shown below, gives the sensation of floating in the clouds.  We decided to give this special home and studio a name and chose "Apatchablue."  I guess it is't too difficult to identify the rational for that choice.

Sunday, August 18, 2013

Little Red Pot


I have been making smaller vessels primarily because of limited shop space in our down-sized new home and my physical limitations won't allow wrestling the six foot plus, 150 to 300  pound vessels around as was my former creative style.  I have also started a new line of vessels that use cast-off containers for the internal cavity.  This method which I have dubbed, Empty/Promises or E/P for short has been explained in previous posts and in detail in the last section of my book, "Unique Vessels: How Do You Make These Things?  It can be accessed on my web page at Apatchablue. com.

This post is focused on one of these E/P vessels, just completed this past week.  The Empty container used is an olive jar as shown here.


 The exterior shape of the jar was modified with the addition of Styrofoam rings.  I chose a unique wood I had in my collection that had a smooth gray bark and a natural red colored wood.  I'm not sure what type of tree these limbs came from, but by asking around and showing the leaf and seed structure to the experts their diagnosis was a unique Eucalyptus tree.


When all parts came together and an oil/wax finish was applied the results are as shown below.

Tuesday, June 25, 2013

Too Many Irons in the Fire

Where did that saying come from?  I have heard some interesting derivations of common terms or sayings.  It would be challenging to put them in a post and ask you, the post reader to add to the list until we end up with a dictionary of saying with derivations.  But not now.  I have too many irons in the fire to take on a new project like that.  My last post was May 8, 2013.  What the heck have I been doing?  Well, I'm back with a bunch of excuses.

JoAnn, my wife, and I have taken over our web site.  We weren't pleased with the way our original site had been designed and had been given very little access to make changes.  We decided to do it ourselves, from the bottom up with some assistance from a knowledgeable woman who teaches this in college.  For what we wanted to do with a web site she advised us to use FrontPage 2003 and arranged an account with Godaddy.  FrontPage has been around a long time and is more understandable than many other programs.  We got a "how to do it" book and started to set up our web site with four galleries to exhibit our work and a number of the other bells and whistles.  It has taken longer than planned, but we want to get it right so the viewers can find their way around easily.  I will be adding to the galleries as new work is completed.  Take a look and let us know if you like it.  Suggestions are welcome. Go to www.apatchablue.com
.
Another "Iron in the Fire" has been my art work.  I am developing a series of vessels shown in Gallery 3 on our web site that I call empty/promises.  This process is explained in the heading of the Gallery 3.  My work is limited to smaller pieces now(12" to 20" tall) because of the down-sizing of our home.  More on that in another post.  I have six pieces in various stages of completion.  This is common practice as some of the steps require a curing time and I can keep busy on other pieces while this is taking place.  Most of the six pieces currently on the workbench are well curried.  I must confess I haven't been able to focus on them.  It's that irons in the fire thing.

In addition to the web site I'm using Facebook and Pinterest to get my word out.  I like to take a short segment of a post and put it on Facebook with a picture.  Then I will pin that same picture on one of my boards in Pinterest.  It isn't that complicated but it does take time.  I invite you to look at these two social media sites,   www.facebook.com   www.pinterest.com.

This past week I have spent 100% of my time on the book I'm writing.  It's my autobiography entitled "Growing Up in the Country" which chronicles my journey from boyhood on a dry land Montana ranch to retirement in Arizona today.  The 600+ pages have been written and currently are undergoing editing.  A potential of over 700 pictures, maps and sketches are collected to augment the story line.  I plan to use short portions of text and pictures from the book on future posts.  They will be identified with the book to give a preview of it's content.

This sums up my leisurely life of retirement and I am enjoying it immensely.  I guess you have to use judgment about when to put another iron in the fire.

Wednesday, May 8, 2013

Can you make an egg?

When JoAnn was studying art at Eastern Washington College of Education, one of her instructors demonstrated how to make realistic shaped plaster eggs.  She applied this process to create a large 12" long plaster egg that she used as a model to form a mold over.  After removing the plaster egg she used the mold to cast a large blue resin egg with a figure inside.  This was described in my recent post, "Memories of an Art Exhibit" as part of one of the pieces on display.

I decided to include this process in my art work so here are the details.  You will need Plaster of Paris, a small neck container like a wine bottle and a medium sized rubber balloon.  Mix the plaster to the constancy of  medium thick gravy, then pour it into the container.  A plastic funnel makes this transfer much easier.  Now blow the balloon up to the size you want the egg to be and a slight bit more for lost air in the next steps.  Quickly slip the balloon over the neck of the container without loosing too much air.  Invert the container and transfer the plaster into the balloon.  Remove the container and tie off the neck of the balloon.  Gently rotate the balloon while tipping it back and forth so the ends also get coated.  This will take some time until the plaster sets up.  Try hold the balloon in the palms of your hands so as not to make indents with your finger tips.  When you detect the plaster has set and is no longer flowing inside the balloon, carefully set your project down and let it dry until the next day.  The balloon comes off easily if you pull out on the end you tied and start a cut in the rubber.  Usually it will tear itself open as it contracts, leaving a smooth white egg.

At this point the egg is quite sturdy if you have used enough plaster to build an 1/8 to 1/4 inch thick shell.  It will brake if you drop it however.  I chose to coat my egg with hardwood segments in a mosaic pattern and finish it as I have the vessels I make.


This project needed a stand to hold the egg while it was on display, so I fashioned a bulky, free-form stand with a recessed area lined with sheepskin, wool side out.  When placed in the "nest" as I refer to it, the egg snuggled down and I felt was secure enough  to go to an exhibit.  It would need a name so was christened, "Woodpecker Nest".


All went well as it traveled around to different exhibits and was stored in the various homes we moved to, but gradually I noticed some cracking occurring between wood segments.  I filled the cracks as shown here with red resin and refinished the entire egg with a clear finish that would seal moisture out and prevent further cracking.  Now Humpty Dumpty has age marks but no further problems have occurred.  If I had it to do over, I would fiberglass the plaster egg and then apply the wood over that, thus giving a fiberglass shell similar to the vessels I make.

I had fun making an egg.  You should try it sometime.

Sunday, May 5, 2013

Merging Tennessee and Montana

The fragrance of Tennessee Red Cedar has always intrigued me as hard to mistake for any other wood with the exception of Juniper Cedar that grows in Montana.  You may have come in contact with the red cedar from Tennessee, used in hope chests or as closet lining.  The distinctive aroma comes from the oil in the wood and most bugs don't like it, so it prevents them from chewing on your clothing or important belongings.

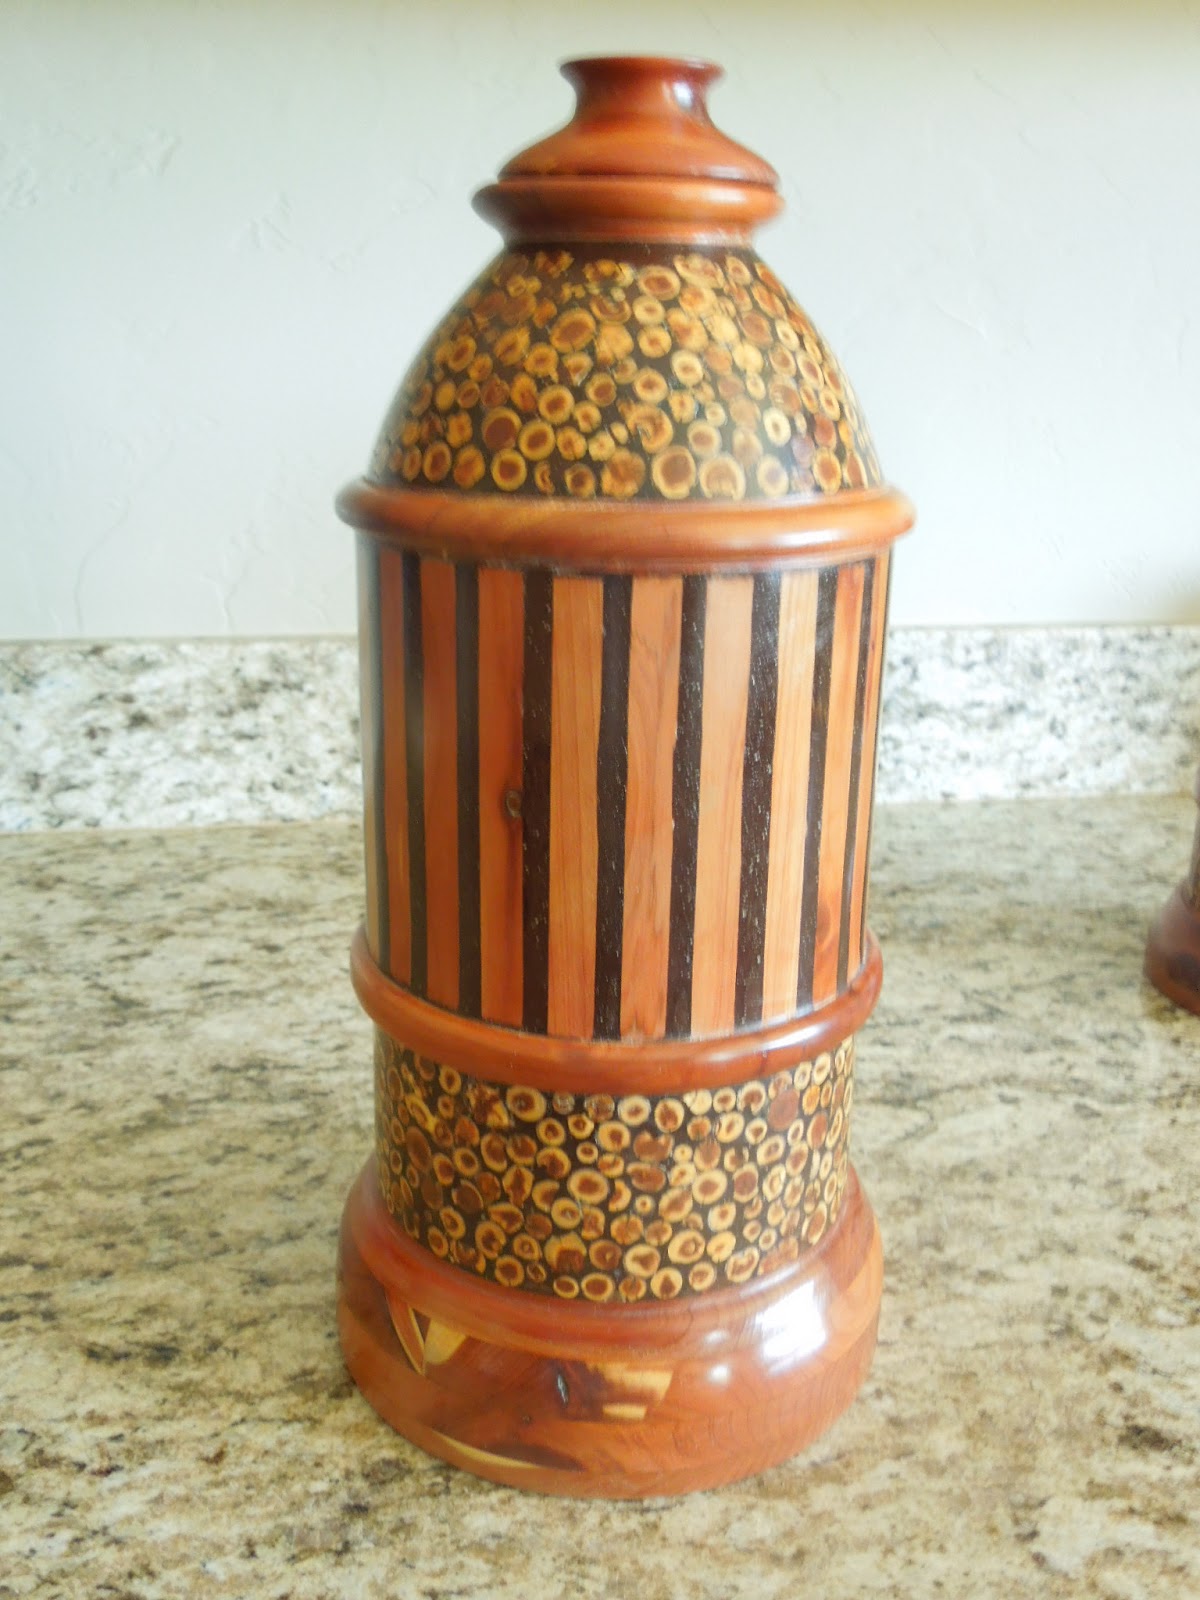
I grew up in southeastern Montana where Juniper Cesar turned the bland countryside into interesting patches of dark green and sometimes a silver tree.  They tend to grow on the walls of canyons and provided a totally different atmosphere.  I can still imagine their evergreen fragrance on a hot day.  We used the dead limbs and trees for fire wood.  They were dragged up out of the canyon and taken home to our woodpile.  As I remember it now, some good sized logs were cut into firewood lengths and split into smaller pieces.  The Juniper Cedar aroma from the split wood was very similar to the Tennessee wood.  Some of the straight pieces were saved for fence posts that would last many years in the ground. I decided it was time to get these two woods together in one of my e/p vessels.  This vessel has a plastic lining (a tonic bottle) so it can be used to hold liquids.


I made two of these vessels over plastic tonic water bottles, one the large 2 liter container and the other a smaller version.  Dimensions of each are as follows:  Large vessel 13.5" tall x 6.5" diameter,  small vessel  11" tall x 5" diameter.  The Tennessee Red Cedar wood was used in the base, central strips and rings as well as the top structure including the removable cap.  The sections of end grain pieces of small Montana Juniper Cedar limbs make up the remaining surface decoration.  In case you are wondering what e/p vessel stands for there is an earlier post that details this.  This last photo shows the relative size of these two vessels.


Black resin holds all the wood pieces in place.  After the surfaces were worked down and sanded smooth, an oil finish was rubbed on and when dry, paste wax was applied and buffed.

Thursday, May 2, 2013

ARCOSANTI BELLS

( a snippet from my autobiography "Growing Up In The Country")


Our friend and my co-worker, Craig invited JoAnn and me to his home in Prescott for a week end.  He had a guest house where we could stay
that offered us all the privacy and comfort of a motel.  Craig suggested we stop at Arcosanti on our way to Prescott and tour that unusual architectural project.  It was just off the main highway a couple of miles.

The route to Prescott is through Phoenix and then north on highway 17, locally known as the Black Canyon Freeway.  Cordes Junction is 55 plus miles up the freeway where highway 69 takes off to the left for another 35 mile drive to Prescott.  To find Arcosanti we continued along side highway 17 another mile past the junction, following a dirt road, which soon turned to the right toward a significant canyon.  Arriving at the edge of the canyon an unusual collection of buildings came into view.  They were built on the crest and down into the canyon.


Arcosanti is an experimental community that began construction in 1970. 
The architect, Paolo Soleri, used a concept he labeled as “arcology”, a combination of architecture and ecology.  He designed the community to demonstrate how urban conditions could be improved through architecture to lessen the negative impact on the environment.  The location of the project is on 25 acres of a huge 4,060 acre land preserve.  When we visited the project it was still considered a work in progress and I would guess still is.  It was designed for a population of 5,000 when finished.  The current number made up of students and volunteers fluctuates between 50 and 150 people.  A massive complex many times larger than the facility we visited, called Arcosanti 5000, was envisioned in his master plan.

The community is building slowly as funding and volunteer help becomes available.  The primary function so far had been education, with students coming from around the world, to study architecture and ecology in workshops and classes.  In addition to the funds raised by education, the students participate in the ongoing construction.  Tourist traffic of approximately 50,000 people per year also creates funds for the project.  Cultural performances are sometimes scheduled in the outdoor amphitheater which draws good sized crowds.  One of the staff I work with told me of a festival held at Arcosanti in 1978.  The large crowd parked their cars in an open, flat area close to the performance and during the festivities a grass fire started, ignited by the hot muffler of one car and quickly spread across the lot.  More than 300 cars were damaged or destroyed.  Unless insurance settled the clams, this may have been a costly festival for Arcosanti.

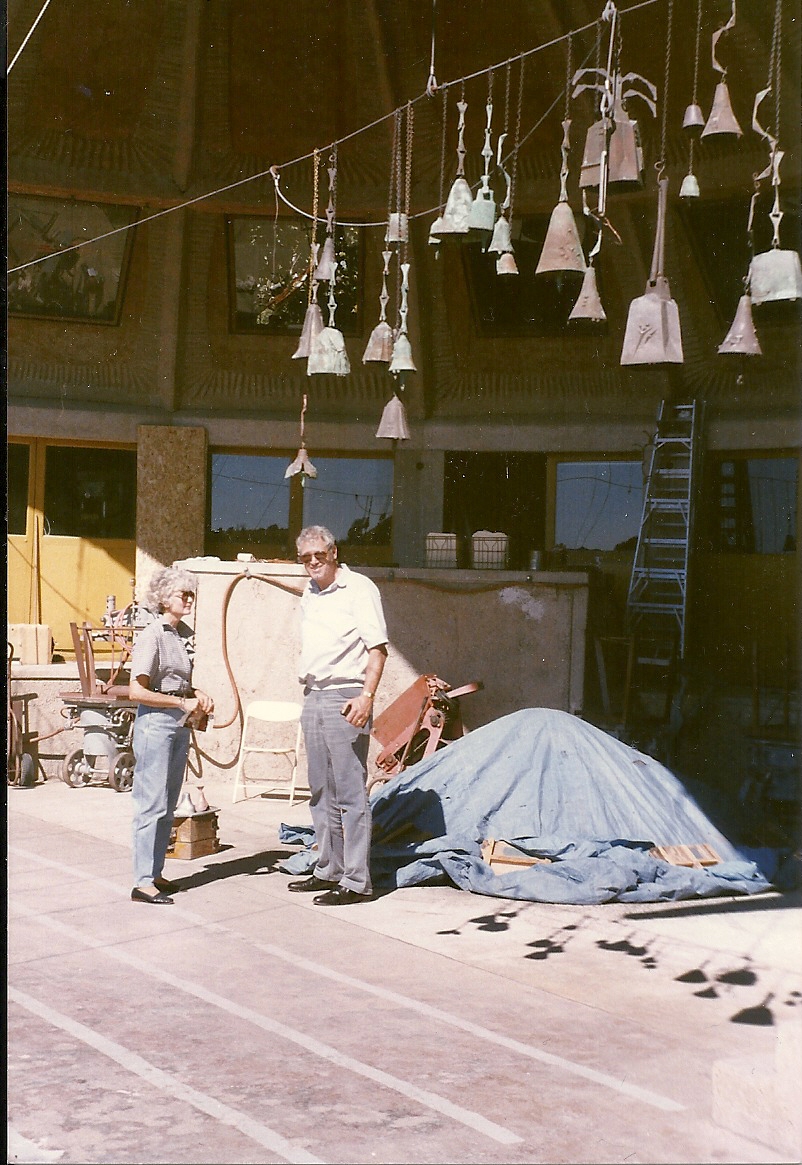
Some funding is generated through the sale of metal and ceramic bells that are designed, made and cast on site.  A small sales outlet and fabricating facility is also located in Scottsdale, at the headquarters of the Cosanti foundation and closer to a larger potential market.  We purchased a ceramic bell at the Arcosanti location.  Later we collected a bronze bell at the facility in Scottsdale.  Their design is distinctive.  They make a good souvenir while helping the community development.


These large shell shaped structures were used as shop space to work on the bells.  I believe this one was where the ceramic bells were made.  The supplies are stored along the back wall in the white containers and the metal drying rack for the green ware is shown there also.


The five story structure housing the visitor’ center, cafe  gift shop and topped with a two bedroom “Sky Suite” available to overnight guests is the tallest point in the complex.


We had to leave for Prescott but vowed we would return when we had more time and possibly stay in that Sky Suite.